Christy Lynn
A specific use case of blockchain has gained massive popularity even outside the crypto domain: Non-Fungible Tokens (NFTs). NFTs have allowed people to sell everything from art, music, and even memes as digital assets online. In some cases, the artists have made vast amounts of money from selling NFTs online.
Now you may be wondering: How can I cash in on this opportunity and sell my own NFTs online?
Quick answer: To create an NFT: (1) make your digital file (art, music, video), (2) set up a crypto wallet such as MetaMask or Coinbase Wallet, (3) choose an NFT marketplace like OpenSea or Rarible, (4) connect your wallet and upload your file, (5) add a name, description and royalties, and (6) mint it. Many platforms now offer free or very cheap minting on networks like Base and Polygon, so you no longer need $100 of ETH to start.
We’re here to help with just that! In this article, we’ll cover what an NFT is, how you can make one in a few simple steps, and how to sell your digital creations online.
Keep reading to learn everything about NFTs, including creating and selling them from scratch!
What is an NFT?
Simply put, a non-fungible token (NFT) is a unique representation of content on the Ethereum blockchain.
Essentially, anything you can represent digitally, you can also tokenize into an NFT. The sky is pretty much the limit for NFTs; you can turn everything from art, music, collectibles, or even internet memes into NFTs.
Once someone creates an NFT, it can only be owned by a single person at a time. In other words, the person who owns the NFT has full ownership rights over the digital asset.

Furthermore, it is impossible to modify the ownership record of an NFT, and since NFTs are unique, only one can exist at a time. This restriction means that you can’t create duplicate copies of an NFT once published on the Ethereum blockchain. NFTs will become increasingly popular with the maturity of the metaverse and metaverse cryptocurrency projects.

Keep your keys offline with a Ledger
- Stops phishing and malware from moving your coins
- Supports thousands of coins and tokens
- Works with phone and desktop
Buy only from the official store. Affiliate link. Compare hardware wallets
What is Non-Fungibility?
One of the defining features of the NFT is its non-fungibility. In economics, a non-fungible asset cannot be interchanged with another asset since it has unique properties. On the other hand, fungible assets are interchangeable with other assets since their defining feature is their value, not their property.
As an example of a fungible asset, think of a $100 bill. The $100 bill is fungible because it can easily be exchanged with two $50 bills and still have the same properties. The $100 bill is therefore defined by its value, not its unique properties.
Compare the $100 bill to a unique art piece, like the Starry Night painting by Vincent van Gogh. Although the latter has an estimated cash value, it has unique properties that are not interchangeable with any other asset globally; only one original Starry Night painting exists.
How to Make and Sell NFT Art (Step by Step)
So far, NFTs may seem a little abstract to you, but don’t worry. We’ll now walk you through how to create your very first NFT art, step-by-step. Once we do, you’ll have a better idea of what NFTs are and how they work.
Here’s how to prepare to make and sell your own NFT art in ten easy steps:
Step #1: Select Artwork
The first step towards creating your custom NFTs is to select the art you want to tokenize.
When we say art, we can mean a couple of things: music, images, or even a piece of code you’ve written. As long as the asset you’ve chosen is unique, you can represent it uniquely on the Ethereum blockchain and can therefore use it to create NFTs.
A simple example of a unique piece of NFT art may be a cartoon character you create on Adobe Illustrator or a photograph you’ve edited on Photoshop.
Step #2: Download MetaMask
Once you’ve selected the artwork you want to tokenize, it’s time to mint your latest NFT art piece. Of course, to mint NFTs, you’ll first need some cryptocurrency. For our example, we’ll be working with Ethereum, one of the most popular choices for creating blockchain today.
To get some Ether, you first need an Ethereum Wallet. Then, your wallet will store the Ether you’ll need to mint your brand-new NFT.
The wallet we’ll be using is called MetaMask. You can download MetaMask for iOS or Android, or even as a Chrome extension.
Step #3: Configure MetaMask
Next, it’s time to configure your brand new MetaMask wallet. After installing MetaMask, execute the application and select Get Started.
Step #4: Create Wallet
You should now see the “New to MetaMask?” screen. Here, you can either Import Wallet if you have the secret recovery phrase to a pre-existing wallet or Create a Wallet to set up a new wallet.
Click Create a Wallet to proceed to the next screen.
The application will now take you to the “Help Us Improve MetaMask” screen.
Select I Agree if you wish to participate in data collection for improving MetaMask, or No Thanks if you wish to opt out. You can select either option here to proceed; it doesn’t matter which one you choose.
Step #5: Create a Password
Now, you should see the “Create Password” screen.
Enter a secure password in the New Password textbox, then re-enter the password in the Confirm Password textbox.
Once you’ve read the Terms of Use, select “I have read and agree to the Terms of Use.” Then, click Create.
Step #6 Watch MetaMask Video
Next, you’ll see the “Secure your wallet” screen. Here, MetaMask will present you with some information about your secret recovery phrase and display a brief video about it.
The video has some helpful information, but you can skip it if you’re already familiar with crypto wallet seeds and seed safety. Instead, click Next to proceed to the “Secret Recovery Phrase” screen.
Step #7 Write Down Recovery Phrase
Now, you can click the hidden textbox to reveal your secret recovery phrase. Next, follow the on-screen tips for securely storing your secret recovery phrase and click Next once you’ve written it down in a safe location.
Alternatively, you can click Remind Me Later if you don’t wish to write down your secret recovery phrase straight away.
Step #8 Buy Ethereum
Finally, it’s time to buy some Ether (ETH) for your newly set up MetaMask wallet.
Open your wallet and go to your Account view. Here, you’ll see the option to Buy, Sell, or Swap ETH. You’ll also be able to view your Assets and Activity.
Click Buy and enter the amount of ETH you wish to purchase. You can buy ETH on MetaMask using your debit card or Apple Pay.
Minting costs have dropped sharply since 2022. On low-cost networks like Base, Polygon or Solana, minting usually costs a few cents to a few dollars, and some marketplaces let you mint for free and pass the cost to the buyer. Note that you may require more ETH to mint your NFT depending on the daily operational price.
Alternatively, you can skip the minting fee entirely if you sell your NFT on Rarible and select the free minting option. With free minting, the buyer can pay the minting fee for the token. We’ll cover this option in more detail in our Rarible section.
Step #9 Select NFT Marketplace
You’re all set! Now it’s time to select the marketplace where you’ll list your NFT. Keep on reading to find out how you can mint your NFTs on two of the most popular NFT marketplaces for Ethereum today.
How to Create an NFT on Opensea
Your first option when it comes to marketplaces for minting NFTs is Opensea.
Opensea is a non-curated NFT platform that lets users mint, buy, and sell their NFTs. Non-curated platforms are those which provide free access for all. Essentially, all you need to upload an NFT on a non-curated platform is to register and pay the NFT token minting transaction fee.
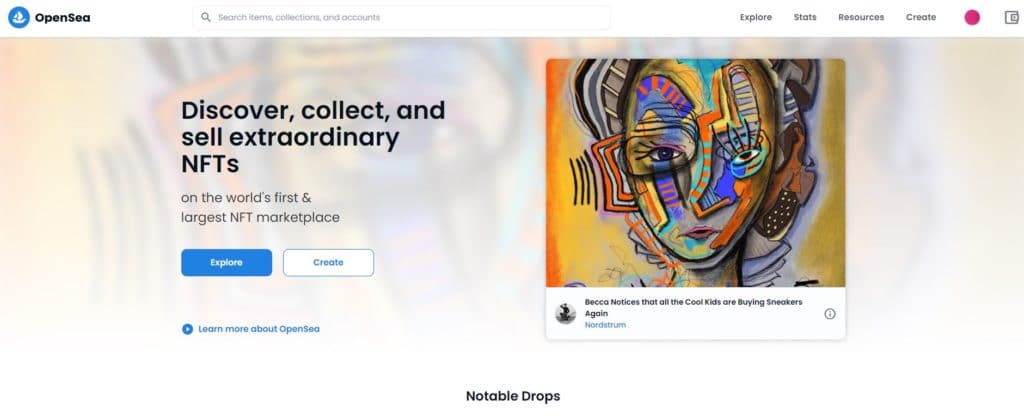
To create an NFT on Opensea, follow the steps below:
Step #1: Go to Opensea Website
Head over to the Opensea website and familiarize yourself with the marketplace. Then, locate the Create button and click on it.
Step #2: Connect your MetaMask Wallet
Once you click Create, the site will take you to the Login screen. Here, Opensea will ask you to “Connect Your Wallet.” One of the first wallet options you’ll see should be MetaMask, so click on it to proceed.
Next, your browser will open a pop-up window to connect your MetaMask wallet to Opensea. You should now see the “Connect With MetaMask” screen pop-up.
Select your account through the checkbox and click Next.
You can also click on the New Account option to add a new account instead (optional, not recommended).
The pop-up window will now request permission to connect to your wallet. The default permission that Opensea requires is “View the addresses of your permitted accounts (required).”
Click Connect to proceed.
Step #3: Approve Signature Request
You’ll now receive a Signature Request for your MetaMask account in another pop-up window.
Go through the message if you wish and click Sign.
Step #4: Create New NFT
Finally, you should see the “Create New Item” screen. Click on the gallery icon to select your NFT. Your NFT should be in one of the supported formats and up to 100 MB in size.
Now, fill out all the details for your NFT, including Name, Link, Description, Collection, etc.
When you’re done, click Create.
Step #5: Sell Your NFT
You’re done! You can now list the item in your collection for sale by clicking the Sell button. The selling page should let you choose the amount of ETH you’ll accept as payment for your NFT.
Additionally, you can select other selling options, such as fixed price versus auction and the royalties you want from the first and each subsequent sale.
How to Create an NFT on Rarible
Rarible is another non-curated NFT platform. The advantage of Rarible is that it has a Free Minting option. Using this option, you can start selling your NFTs straight away without having ETH in your wallet for minting.
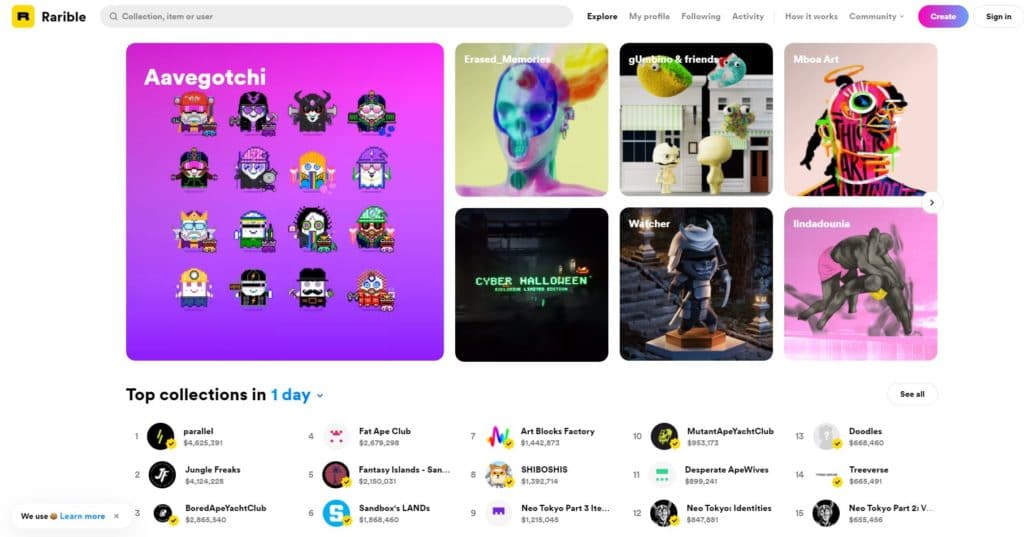
Here’s how to create an NFT on Rarible:
Step #1: Sign In to Rarible with MetaMask
Go to Rarible and click Sign In > Sign In With MetaMask.
The rest of the procedure for connecting your MetaMask is the same as step 2 in the previous section.
Step #2: Create Single or Multiple NFT
Once you’re signed in to your MetaMask wallet, click Create from the Rarible homepage.
You will now see the option for Single or Multiple. You can select Single if you want your NFT to be unique or Multiple if you wish to sell a single NFT multiple times.
We have chosen Single for this tutorial, which complies with the ERC-721 NFT open standard and supports timed auctions.
Step #3: Choose Art File
You should now see the “Create Collectible” page. The options for this page will be different based on whether you selected a single collectible or multiple.
Click the Choose File button to select the asset that you wish to tokenize. Again, the file format should conform to the supported formats and have a maximum size of 100 MB.
Step #4: Set NFT Price
Next, toggle the Put on marketplace option if you wish to let users instantly purchase your NFT from the marketplace with some ETH.
You can further select the Fixed price, Timed auctions, and Open for bids options if you toggle the marketplace option.
If you select Fixed price, list the flat fee you will charge for your NFT. Rarible will charge a service fee of 2.5% for every sale.
Alternatively, if you select Timed auctions instead, enter the minimum bidding price under Minimum Bid, the Starting Date, and the Expiration Date of your auction.
Step #5: Give Your NFT a Title
Now, choose the collection you want your NFT to be a part of, then give it a Title. You may also include an Optional Description here if you wish.
You can also toggle the Free Minting option if you want the NFT buyers to pay the gas fee for minting.
Step #6: Set NFT Royalties
Next, enter the percentage of Royalties for your NFT. You can also select the Advanced Settings here if you wish, but you don’t need to for your first Rarible NFT.
When you’re done with everything, click Create item.
Step #7: Mint NFT and Sell
We’re almost done! Now you’ll see a screen where you’ll have the option to Mint token and Sign a sell order using your wallet.
If you select Mint token, MetaMask will pop up in another window and prompt you to confirm the transaction.
Once you’re done minting, or if you selected the Free Minting option, proceed to sign the sell order with your wallet.
After signing the sell order, Rarible will redirect you to your profile page, where you’ll be able to see your newly listed NFT in your collectibles.
The Bottom Line
That’s all there is to it! As long as you follow the instructions we’ve outlined, you should be able to set up your Ether wallet and sell your NFTs on Opensea or Rarible in no time. NFTs have become extremely popular within the past few years. In some cases, artists worldwide have made massive income from selling memes, art, music, and more through NFTs. By creating and selling NFTs, you’ll also be able to join this exciting new blockchain opportunity.
Free masterclass
Learn crypto the right way.
Christy Lynn’s free beginner course, straight to your inbox. Plain English, never spammy.
Join free and get one 5-minute lesson in your inbox every 1–2 days:
✅ What crypto actually is, in plain English
✅ The 5 safety rules that protect your money from scams
✅ Where to buy, and exactly how to invest your first $100
✅ How to store your crypto safely and earn staking rewards
✅ How to research coins and handle crypto taxes
No hype, no spam. Unsubscribe anytime.
Frequently asked questions
How much does it cost to create an NFT?
Often just cents to a few dollars on networks like Base, Polygon or Solana. Minting on Ethereum’s main network costs more but is much cheaper than during the 2021–2022 NFT boom.
Can I create an NFT for free?
Yes. Some marketplaces offer “lazy minting,” where the NFT is minted only when someone buys it, and the buyer pays the fee.
Do NFTs still sell?
The NFT market is far smaller than its 2021–2022 peak, so most new NFTs sell for little or nothing. Build an audience before expecting sales.